Oh I am so so so excited to post this DIY. I have been
planning on this one since like forever… Now that I have finally done
it, I am going to wear it for every picnic, every get together, every
house party and what not… Lol! Just kidding! I will wear it enough
though cause I am totally loving it :)
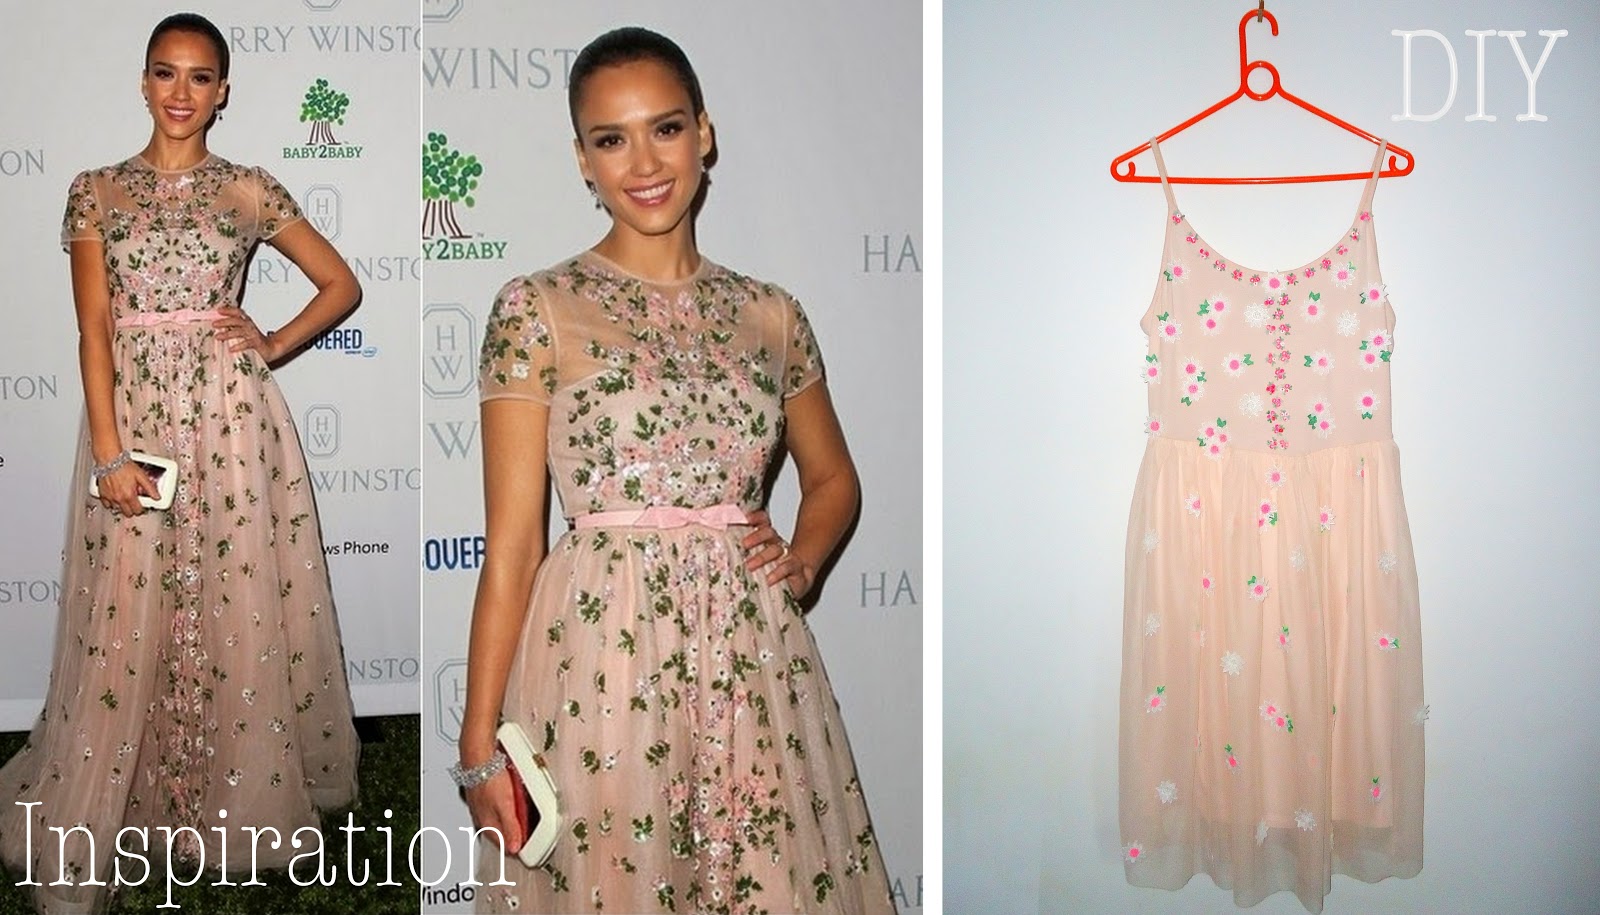 |
| Original Valentino Dress Vs. My DIY |
Okay, to start with, let's talk about my inspiration. Honestly, isn't that a seriously cute dress? I
really love the designs by world famous designer Valentino, but this one just
takes the top spot. I mean, just look at Jessica here… So elegant, so poised… Doesn't she just look so darling and innocent (may be a bit too innocent) as well as quite angelic too?!?!
 |
| Such an enchanting smile! |
Sequin and beads embroidery detailing on the dress is simply stunning and flawless! Several and I mean SEVERAL floral dresses have been worn in the past few months (may be years) by celebrities on red carpet and Gala events but I am a total sucker for nude dresses, and there is something about this one that i just can't shake... The more I look, the more I want it :). However, of course with big names come big price tags! The dress costs 1000s of pounds and even the ebay imitation dress is slightly out of my budget.
eBay imitation dress
So, I decided I would just bring out my DIY gloves and make a Valentino inspired dress for myself, by myself ;)
Here's how:
Coming to the dress DIY itself, to be honest, it is actually easier than it looks, or may be I chose an easy route to make it :p The DIY was time consuming but very simple. It took me about an hour and a half in total to complete it (excluding my snack breaks, toilet breaks and breaks for no real reason) but that was only because I had to customise my own appliqués. Plus the sewing... I am quite bad at it still so takes me a while. Anyway, you will find how easy and beautiful this one turns out to be…
For this DIY, I used:
1. A nude tulle midi dress
 |
| Nude tulle dress |
I love the original Valentino dress (obviously) but I wanted to make one that I would be able to wear on a casual day too. So, I bought this lovely topshop midi nude tulle dress... It is so perfect that I just HAD to buy it, although it is a size larger than mine… Besides, it was on bargain ;)
2. Floral appliqués
 |
| Pink and green rosette appliqué |
Next, I bought two types of appliqués, one is the pink and green rosette appliqué and second one is the white daisy embroidered crochet appliqué trim, to sew/glue on the dress to match the Valentino piece. The white crochet appliqués are the same ones that I used for my daisy shoes and daisy bracelet DIYs.
3. Fabric colour pens
 |
| Fabric colour pens |
4. Fabric glue, needle and thread
Any industrial fabric glue should work fine but if you want to ensure the appliqués don't fall off easily, best to sew them up on the dress.
 |
| Fabric glue |
5. Pink belt
Well, just for the occassion, I had a thin pink waist-belt with a pretty bow at the buckle. Just PERFECT!
Show time:
1. First of all I had to prepare my appliqués:
I used pink fabric pen to add colours to the white embroidery flower trims. I coloured the centres of the daisies pink.
 |
| Colouring my flowers |
And for leaves, I first coloured the flowers green and then cut them into smaller pieces. The flowers have 10 petals so I divided them to 3-5 sections of 2-3 petals each.
 |
| 3 steps to leaves |
2. Next I glued the appliqués one by one on the torso, front and back, using fabric glue.
 |
| Gluing the appliqués |
I also went ahead and glued the white daisies and leaves on the torso.
 |
| Torso with the appliqués glued on |
3. Then, for the bottom part, my advice would be to best sew the white embroidery flower appliqués one by one on to the skirt, it should be quite easy to do so especially since the skirt is made of tulle.
Well, to be completely honest with you, I got a bit bored after a while and took a short cut (although not recommended) by gluing the rest of the appliqués, distributing them in an evenly but not symmetrical pattern all across the tulle.
 |
| Sew on the appliqués to the tulle |
VOILA!
And there you go!
I turned my cute little topshop midi dress to a darling vogue dress...
I just love the outcome… Although the original is quite elegant, mine turned out to be quite graceful too. Just loving it… Especially since it was achieved sooooo easily. And guess what, this dress cost me just about £10 to make ;) Ain't that something!?!
Here is the full dress front and back:
Take another look (or more) at the finished product:
Hope you liked my DIY for a beautiful Designer inspired dress. I look forward to posting more very soon (yup, I am already working on two of them… Can't hardly wait!). Let me know what you think of my DIYs… Until next time, keep shining!!!
 |
| Tadaaaaaa!!!! |
Loads of love,
Jb


Comments
Post a Comment